Printfriendly

Monday, December 5, 2016

Air fried tofu 3 different ways


I've been enjoying cooking and experimenting with my new air fryer for oil free frying and cooking. 
 
Thought I'd give tofu a try 3 different ways -  untreated,  dredged in corn starch and dredged in rice flour. 

I used no other seasoning.   All I did was drain some extra firm tofu and slice it.   I didn't pat it dry at all.

1) The first try was the plain tofu.   Just straight into the air fryer.   I turned my temperature all the way up which was 392 on my particular fryer.   It took about 15 minutes for me.   I am at a high altitude so your mileage may vary.

2)  Next up was tofu dredged in cornstarch.   It seemed to take a bit longer to brown.

3) Last was tofu dredged in rice flour.   This one seemed to take the longest time to brown.


Here are the results:

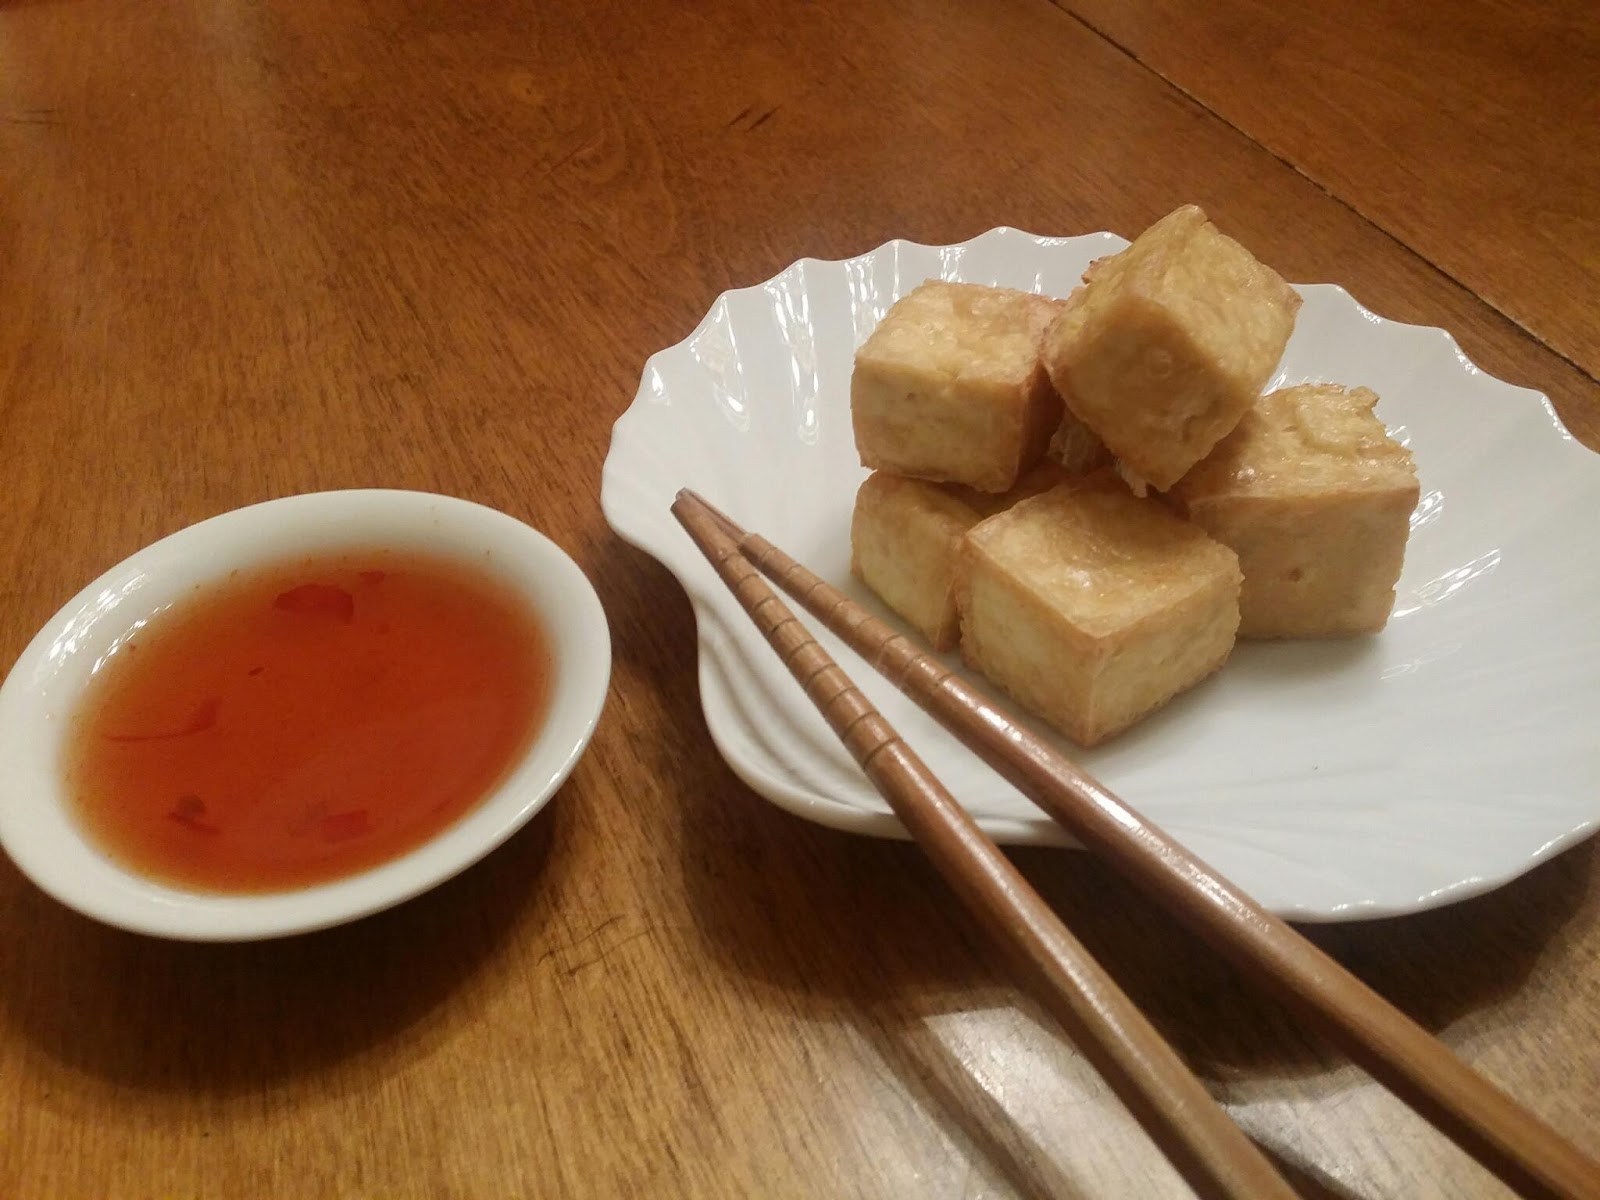
Plain tofu -  Color was a golden yellow hue.   Texture was firm,  spongy and chewy.   Pleasant mouthful.   This is a photo of the plain tofu on its own.


Corn starch dredged tofu -  whiter in appearance with a shiny hard surface,  felt like glass or shellac.    Once I bit into it, it had a very hard and crunchy shell but it was soft and chewy on the inside.    It also softened with soy sauce. 


Rice flour dredged tofu -  also white in appearance with a lighter and crispier outside.   Biting into it was crispy but not hard and very chewy and soft on the inside.   The soy sauce also softened this one.


Conclusion -

I enjoyed all 3 applications and would use them in different ways. 
 
1)  The first, untreated,  was just like baked tofu 

2)  The second,  dredged in cornstarch was like deep fried tofu 

3) The third,  rice flour dredged tofu was very similar in texture to stir-fried tofu.

All in all, I happily will not be going back to traditional baking which seemed to take a lot longer.    Also the need to press the tofu is not necessary unless you want a real compacted result.

Enjoy!


Monday, October 17, 2016

Clarifying labels - Sugar Free vs. No Added Sugar vs. Naturally Sweetened vs. Unsweetened


The terms Sugar-Free,  No Added Sugar, Naturally Sweetened, and Unsweetened can be confusing.  What do they all mean?   Here is a handy guide that sums it up. 


Sugar Free

  Means no sugar was added to the product, and usually artificial sweeteners or sugar alcohols are added to give it the sweet taste it is meant to have.     

  This is usually added to something like desserts, candy, gum, baked goods, flavored coffee syrups and creamer and anything that is meant to have a very sweet taste.


No Added Sugar

  Means that no sugar was added to the product. 

  Often the product does contain sugars because it is already naturally sweet from their contents such as fruit juices (like grape or apple juice) or dried fruit (like dates or raisins).  It can also mean that jams or jelly are sweetened with additional fruit juice. 


Naturally Sweetened - 

  Means no white or refined sugar was added, but honey, maple syrup, evaporated cane juice or other natural sweeteners may have been added.

  Cereals and snacks can be sweetened with other natural sweeteners.  Be sure to check labels. 


Unsweetened

  Means that nothing has been added to the product to give it a sweet taste - either sugar or artificial sweeteners.  

  For example many milk substitutes such as almond and cashew milks are now available unsweetened.   But it can also mean that the product is naturally sweet such as applesauce. 


So, what should you look for when making a purchase for your plant based diet?

If you are buying products for recipes or to add to your plant based diet, your best bet is using something with no added sugar or unsweetened, be sure to check labels for as few and simple ingredients as possible, and of course they should be free of meat, dairy and oils. 

Tuesday, June 7, 2016

5 Quick Steps to Super Easy Carrot Dogs


Calling all hot dog enthusiasts - and a true vegan might even shudder a bit because the texture is very much like a wiener.   In fact these sort of turned me off the first time I made them since I'd been away from meat for so long, it was a little *too* meat-like for me.

These are perfect to bring to the next BBQ you are invited to:

Cook them up ahead of time and then wrap them up in foil 
(if you are freaked out about foil, wrap them in parchment paper first, then foil)  then you can heat them on the BBQ right in the foil package, without them touching whatever else has been on the grill.  You might even convert a few people - with all the accompaniments they have won over many a meat eater. 


Steps to Success:

1)  It is important to peel the carrots, giving them the smooth outer texture you are looking for.   You don't want to bite into a tree trunk here. 


2) Slice the carrots to the size of the bun that will hold them.


3)  Place the carrots in the skillet with the water, liquid smoke and seasonings.


4)  Cover the skillet and bring to a boil, lower the heat and cook for 15-20 mins or until fork tender.   You don't want these to be hard, and they should hold their shape nicely. 


5)  Add your choice of condiments - enjoy!


Super Easy Carrot DogsBy Sharon Oliver

Ingredients:

5-8 carrots (or as many as you can fit in your skillet)
2-3 cups water
3-4 drops Liquid Smoke
1/4 tsp or to taste seasonings, such as - Spike, Garlic Salt, Onion powder, Smoke Paprika, Ground Black Pepper
Buns for the carrot dogs and your choice of condiments

1)  Peel the carrots

2)  Cut the carrots to the length of your preferred bun

3)  Place the carrots in a shallow skillet with the water, liquid smoke and seasonings

4) Bring to a boil, cover, then lower the heat and simmer 15-20 mins or until fork tender

5) Place in buns and add your choice of condiments


Thursday, March 17, 2016

Creamy Penne


Apologies for the drab photo,  made this at night!    

Super-creamy and very Mac and cheese-like.   A true comfort food!


Creamy Penne
By Sharon Oliver

Serves 1

1 dry cup mini penne pasta,  cooked

Sauce:

1 cup plant based milk
1 heaping Tbs tapioca flour
3 Tbs nutritional yeast
1/2 tsp onion ppwder
1/2 tsp garlic powder
Dash turmeric
Salt &  pepper to taste
3 Tbs diced Miyoko's Aged English Creamery Smoked Farmhouse cultured nut product (optional -  had this on hand and it lended a smokey cheesy flavor,  you can use a few dashes of smoked paprika here instead)

Place sauce ingredients in a jar and shake to combine.   

After draining pasta,  return to pot and pour sauce over it, stir and simmer until sauce thickens.


Saturday, February 27, 2016

Chickpea of the Sea Salad


If you haven't had a traditional tuna salad sandwich in 15 years like me, this will bring back some fishy memories!  


If you feel this needs to remind you more of a tuna salad, you can add dehydrated sea veggies to give it a more ocean-y flavor. 


Better yet - if you are a meat eater and having company, make this for a loved one who is on a plant based diet.   Hand them the recipe first so they don't get too suspicious!


Chickpea of the Sea Salad
By Sharon Oliver

1 can chickpeas, drained & pulsed in the food processor to resemble flaked tuna
1/3 cup chopped celery
1/3 cup chopped sweet or green onions
1/4 cup sweet pickle relish
1/4 cup plant based oil-free mayo (I use and love the cashew tofu mayo from  Fat Free Vegan)
1 tbs lemon juice, or more to taste
1 tsp dried dill 
salt & pepper to taste


Gently mix ingredients together in a bowl.   Enjoy plain or as a sandwich filling!